It's time to start the border of the Scallop Seashell Washcloth! If you've skipped ahead to this section, then you should know that I'm using a smaller hook than the pattern calls for. You'll see a size H/8 - 5.00MM hook being used in the tutorial photos. There's going to be a lot of steps, so look for the link to the tutorial you need if you want to skip ahead (at end of post). Let's get to it!

Click here to open the pattern in a new window
 |
| Here's the finished body. Turn it almost completely upside down to begin in Row 2, but don't flip it over! |
 |
| Here you can see Rows 1 and 2 highlighted. Row 2 is where you will begin. |
 |
| Join with a slip stitch (sl st) in the side post space of Row 2. |
 |
| Chain (ch) 5 to begin. This counts as a beginning double crochet (dc) and chain-2. |
 |
| Make 1 dc in the same space. |
 |
| Make 2 dc in the side-post space of row 1. |
 |
| The next stitch will be a front-post dc (fpdc) in the next available dc of Row 1. You can easily find the stitch by following the line of raised post stitches. |
 |
| The fpdc stitch will be in front of the beginning circle, and may seem a bit odd until you make the next stitch. |
 |
| Make a dc in the space between the fpdc and the next stitch. This will begin to secure the beginning circle if you've left it loose. |
 |
| Working across, you will make a fpdc the next dc, then make a dc in the space after. Stop before the last stitch. But... Where's the last stitch? |
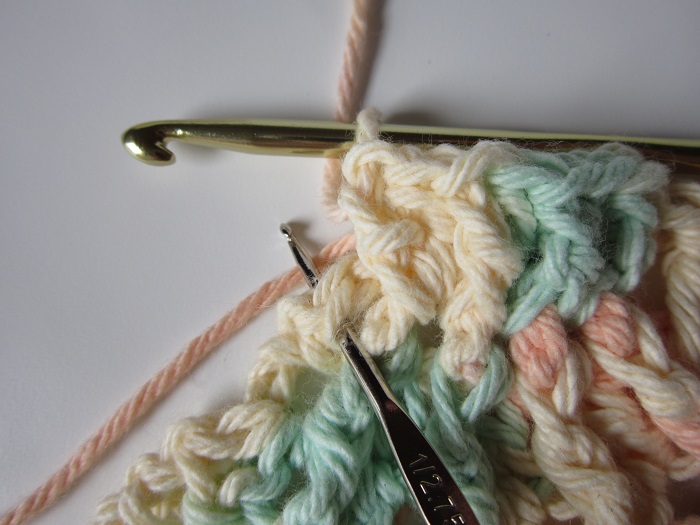 |
| That last stitch will be a bit tricky to find with all those stitches squeezed into the row! Here I've used a smaller hook to pull it out from under the previous stitch. |
 |
| Moving around to the side, make 2 dc in the side-post space of Row 1. |
 |
| Make (1 dc, ch 2, 1 dc) in the next side-post space (Row 2). |
 |
| Ch 2. Now get ready for that single crochet three together (sc3tog)! It will begin in this same space. |
 |
| Here I'm pulling up the loops of my sc3tog with extra slack, so it's easier to follow each. Pull up a loop in the same space as the last stitch, then pull up a loop in each of the next 2 side-post spaces. |
 |
| When you make your sc3tog with normal tension, it will begin to pull the pattern a bit, before you pull through the loops on the hook. |
 |
| And once you pull through all four loops on the hook, it will really pull together! Finding where to work into the chain-space and the sc3tog in the next round is the biggest complaint I've heard, so mark these stitches now if you need. |
We've worked past the first major obstacle!
Click here to continue the tutorial
-Or, skip to the section you need:
Part One - Body - Tips for beginning the pattern, increases, and post stitches
Part Two - Body - Finishing the last row
Part Five - Border - The beginning of round 2 up to the first sc3tog
Part Six - Border - Finishing the pattern!
Happy Crocheting!


Comments
Post a Comment
This is not a political website. Any comments with political content will be removed. Y'all need to learn how to act right.