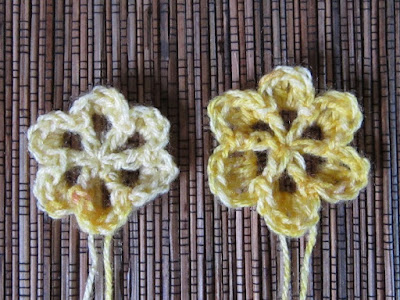
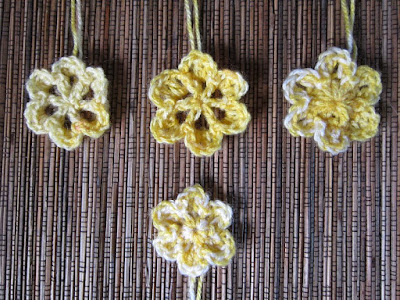
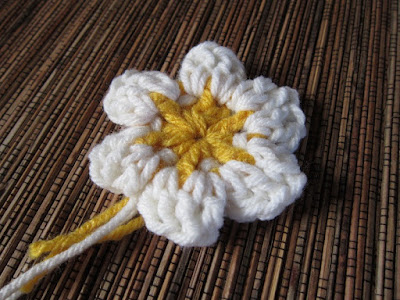
Crocheted flowers can be used for so many things! Embellishments, hair clips, headbands, barefoot sandals, wall decorations, gift bows... That's just a handful of examples, and I bet you can think of more! I went through a ton of variations while trying to create the perfect flowers for Mom's Afghan, so now I'm sharing just a few of them with you. (Version 1 is the same flower I'm using for the afghan, but here it's worked in DK.)
These are all created with the same basic pattern, while adjusting the stitches and count in the center or for the petals. One special technique gives the flowers some depth, but I'll show you another version that's worked without it for a completely flat motif. You can use them alone or stack them together for an even more three-dimensional flower! And from thread to bulky weight, you can use any material; just adjust your hook size. You get the point, right? All the variations are supposed to be more of a concept than specific instructions for a pattern. See what you can make!
Skill level:
Explanation of materials, gauge, notes and stitches:
Use any yarn you wish! Check the label for the manufacturer's recommended hook size. The flowers you see in this post were created with a combination of worsted weight yarns (Red Heart Super Saver, Caron One Pound - Versions 5 & 6), DK (Bernat Baby Jacquards - Versions 1 through 4), and Red Heart Fashion Thread, #3 or #5 - Version 7); hook sizes used were H/8-5.00 MM, G/6-4.25 MM, and a size 3 steel hook.
Stitch markers may be desired to mark the beginning stitch of rounds.
You'll also need a yarn needle or smaller hook to weave in ends.
Because there are so many variations, I won't be providing gauge or a list of stitches for these flowers. I will be including extra notes for each variation. I'm writing the instructions without abbreviations, and you'll be expected to know (or look up) the stitches used. That means we can get right to the directions, so let's go!
*I'll be leaving the tails loose for every one of my flowers, so they can be used later for sewing the pieces to their final destination - whatever that may end up being. ALL versions shown were created by working over the beginning tail and pulling tight to close the center.
Center used for versions 1 & 2
Center used for Version 4
Center used for versions 3, 5, 6 & 7
The "special" technique:
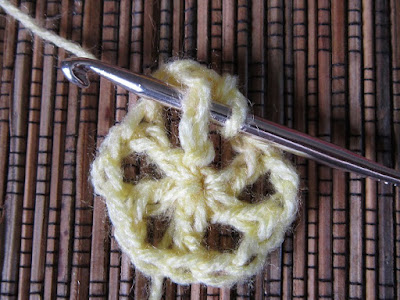
To slip stitch over the post: You will insert your hook under the post, from in front of your work. This will leave the stitch on top of the post.
To slip stitch behind the post (Version 5), you will insert the hook over the post, from behind your work. This will leave the stitch behind the post.
Versions 1 and 2:
Beginning with a magic circle, or working all stitches into your beginning loop: Chain 6 (counts as a double crochet + chain-2), (double crochet, chain 2) 5 times in loop. Join with a slip stitch to the beginning chain-3.
Version 1, Round 2:
(Slip stitch over the post of the next available double crochet, chain 2. Make 2 half-double crochet in the chain-2 space, chain 2) 6 times around. Join with a slip stitch to the beginning slip stitch.
Version 2, Round 2:
Following the same instructions for version 1, replace the half-double crochet stitches with double crochet stitches.
Notes:
I did not adjust the number of chains before the stitches in round 2, because I wanted the petals of version 2 to curl up a bit more. You could chain 3 if you want the petals to curl less.
You could also use triple crochet stitches for the petals. Adjust number of chains if needed.
Version 3:
Center/first round:
Beginning with a magic circle, or working all stitches into your beginning loop: Chain 3 (counts as a double crochet), make 11 more double crochet in the loop. Join with a slip stitch to the beginning chain-3.
Round 2:
(Slip stitch over the post of the next available double crochet, chain 2, double crochet in the space after the post. Double crochet in the next space, chain 2) six times around. Join with a slip stitch to the beginning slip stitch.
Notes:
The petals for this version are the same as Version 2, but the stitches are worked over the double crochets instead of chain spaces. See Version 6 for a way to add even more texture when using the "solid" center.
Version 4:
Center/first round:
Beginning with a magic circle, or working all stitches into your beginning loop: Chain 1 (counts as a single crochet), make 11 more single crochet in the loop. Join with a slip stitch to the beginning chain-1.
Round 2:
Follow instructions for Version 2, Round 2.
Notes:
It can be difficult to work the "post" slip stitches over the short single crochet stitches of the solid center. If you need a smaller center, you can also replace the double crochet stitches of the "open" center pattern (Versions 1 & 2) with single crochet.
Version 5:
Center/first round:
Follow instructions for Version 3.
Round 2:
(Slip stitch behind the next available double crochet post. Chain 2, double crochet 2 in the space after the post. Double crochet 2 in the next space, chain 2) 6 times around. Join with a slip stitch to the beginning slip stitch.
Notes:
Working the "post" slip stitches from behind plus making a color change will cause a dot of the second color to show on the center. This pattern may be better kept as a single color.
Version 6:
Center/first round:
Follow instructions for version 3.
Round 2:
[Slip stitch over next available double crochet post, chain 2. (Double crochet 2, chain 1, double crochet 2) in space after post. Chain 2, skip the next double crochet] 6 times around. Join with a slip stitch to the beginning slip stitch.
Notes:
This is (almost) exactly the same pattern as Version 5, but the "post" slip stitches are worked in front, and a chain is added to the petals to create a bit of a point - Plus, every other stitch of the center is skipped. Experiment with the number of chains and stitches in the petals to create more depth!
Version 7:
Center/first round:
Follow instructions for version 3.
Round 2:
(Slip stitch in the next double crochet, chain 2, double crochet in same space. Double crochet in next stitch, chain 2) 6 times around. Join with a slip stitch to the beginning slip stitch.
Notes:
This version shows you how to make the flower completely flat, but you can add more texture again by adding to the number of stitches in the petals.
- - - - - - - - - - -
I have provided you with three different centers, and various ways to work the petals around them. I kept the stitches - single, half double, and double crochet - simple for the sake of the pattern, and written it in easy repeats so you can even adjust the number of petals.
Beginners - You can easily make your flowers more "frilly" just by increasing the number of stitches in each petal. The more stitches you add, the more your petals will fold over each other.
Now, what if it's just too simple for you? More advanced crocheters - Replace those basic stitches with puff, bullion, popcorn, or maybe even loop stitches. See what kind of combinations you can come up with!
Happy Crocheting!


Comments
Post a Comment
This is not a political website. Any comments with political content will be removed. Y'all need to learn how to act right.