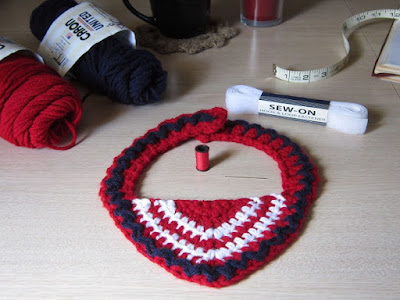
Make sure those baby bronc busters are geared up right! Even the littlest cowboys and cowgirls need a bandanna for ridin' the range. Since the youngun's are a mite too small to be tyin' their own, here's one that ya'll can stick on for em'. A few color changes and some fancy stitchin' make this here kerchief snazzy enough for the town hall dance after the dogies are rounded up.
Okay, enough cowboy-talk and let's be serious. This bib was made to fit from 6 months to 12 months, with a circumference of 12" (30.5 cm) around the neck. The body is 4" (10 cm) long, at the point. After consulting my size chart, I discovered that a neck of 12" should fit from 6 - 18 months. Really? Doesn't the kid grow somewhere in between there? I don't have any 18 month old to try this out on, so I'm cutting the size off at 12 months for safety, and you won't make a bib that cuts off the poor kid's circulation. If you happen to know baby sizes better than me and you have the answer, please leave a comment to help others out.
Skill level:
Materials:
3 colors worsted weight (4) acrlic yarn
-I used Caron United in Cherry, White, and Navy
Crochet hook size H/8-5.00 MM or size needed to obtain gauge
Yarn needle
Matching colored thread
Sewing needle
Sew-on Velcro
Gauge:
In 4" by 4" (10 cm by 10 cm)
8 rows of 12 half double crochet
Notes:
Chain 2 at beginning of rows always counts as a half double crochet
In straps: Chain 1 at beginning of rows always counts as a single crochet
Change colors on the last yarn over of a stitch. (For hdc: Yarn over, insert hook, pull up a loop - 3 loops on hook. Yarn over with new color, pull through all 3 loops.
Stitches and abbreviations:
Chain (ch)
Slip stitch (sl st)
Single crochet (sc)
Half double crochet (hdc)
Skip (sk)
Space (sp)
Stitch (st)
Directions (body):
Begin with Color A (CA).
Row 1:
With slip knot on hook, ch 2 (counts as first hdc). Make (1 hdc, ch 1, 2 hdc) in farthest ch from hook.
Row 2:
Ch 2 (counts as hdc), turn. 1 hdc in first hdc. 1 hdc in next hdc. (1 hdc, ch 1, 1 hdc) in ch-1 sp. 1 hdc in next hdc. 2 hdc in last hdc.
Row 3:
Ch 2, turn. 1 hdc in first hdc. 1 hdc in each of next 3 hdc. (1 hdc, ch 1, 1 hdc) in ch-1 sp. 1 hdc in each of next 3 hdc, 2 hdc in last hdc; change to Color B (CB) on last st.
Row 4:
Ch 2, turn. 1 hdc in first hdc. 1 hdc in each of next 5 hdc. (1 hdc, ch 1, 1 hdc) in ch-1 sp. 1 hdc in each of next 5 hdc. 2 hdc in last hdc; change to CA on last st.
Row 5:
Ch 2, turn. 1 hdc in first hdc. 1 hdc in eaach of next 7 hdc. (1 hdc, ch 1, 1 hdc) in ch-1 sp. 1 hdc in each of next 7 hdc. 2 hdc in last hdc; change to CB on last st.
Row 6:
Ch 2, turn. 1 hdc in first hdc. 1 hdc in each of next 9 hdc. (1 hdc, ch 1, 1 hdc) in ch-1 sp. 1 hdc in each of next 9 hdc. 2 hdc in last hdc; change to CA on last st.
Row 7:
Ch 2, turn. 1 hdc in first hdc. 1 hdc in rach of next 11 hdc. (1 hdc, ch 1, 1 hdc) in ch-1 sp. 1 hdc in each of next 11 hdc. 2 hdc in last hdc.
Row 8:
Ch 2, turn. 1 hdc in first hdc. 1 hdc in each of next 13 hdc. (1 hdc, ch 1, 1 hdc) in ch-1 sp. 1 hdc in each of next 13 hdc. 2 hdc in last hdc. Do not bind off.
Beginning of left strap:
Row 9:
Do not turn. Ch 2 (counts as hdc), 1 hdc in post sp. 2 sc in next post sp.
Row 10:
Ch 1 (counts as sc), turn. 1 sc in next sc. 1 hdc in each of next 2 hdc.
Row 11:
Ch 2, turn. 1 hdc in next hdc. 1 sc in each of next 2 sc.
Rows 12 - 30:
Repeat rows 10 and 11 (8 times), repeat row 10 once more.
Bind off, weave in ends.
Right strap:
Row 1:
With CA and wrong side facing, join in the side post space of row 7. Ch 1 (counts as sc), sc in same sp. 2 hdc in next space (row 8).
Row 2:
Ch 2, turn. 1 hdc in next hdc. 1 sc in each of next 2 sc.
Row 3:
Ch 1 (counts as sc), turn. 1 sc in next sc. 1 hdc in each of next 2 hdc.
Rows 4 - 22:
Repeat rows 2 and 3 (8 times), repeat row 2 once more.
Bind off, weave in ends.
Surface crochet embellishment:
*I tell you in the following instructions to begin with the right side facing you. In the picture above, you see the back side of the surface crochet, which some may prefer. If you want the thinner single strand to show instead of the crocheted loops (seen in display photo), begin with the wrong side facing.
Working down right strap -
With Color C and right side facing, bring up a loop in the middle post space of row 30 (body). Sl st in the middle post space of row 29 to secure. *Pull up a loop long enough to reach the ending hdc sp of next row, sl st in this space. Pull up a loop long enough to reach the middle post space of the next row, sl st in this space.*Repeat from * to * until reaching the main body of the pattern.
Working across the body -
Pull up a long loop, sl st in first hdc of body. Pull up a long loop, sl st in post sp of row 10. **Pull up a long loop, sk 1 post sp, sl st in next post sp of row 11. Pull up a long loop, sk 1 post sp, sl st in next post space of row 10.** Repeat from ** to ** to the space before the corner ch-1 of row 10. Sk 1 post sp of row 11, pull up a long loop, sl st in the next post sp of row 11. Pull up a long loop, sl st in ch-1 corner sp of row 10. Pull up a long loop, sl st in first hdc post sp after ch-1 sp of row 11. Pull up a long loop, sl st in post space of row 10.Repeat from ** to ** to end of body. Repeat from * to * to end of left strap. Bind off, weave in ends.
With needle and matching color thread, sew on 2" (5 cm) Velcro to the end of each strap.
*If you follow the blog, then you know my (lack of) sewing skills! If not, then you can always refer to my post "I am a Sewing Dummy". The following is an example of how I sewed on the Velcro. It's probably not the right way, but it works for me... Except for that part where I became a pincushion... That hurt a little :)
First, gather all needed supplies, including coffee. The yarn isn't needed for attaching the Velcro, and I don't know why it's in the picture. Maybe because I needed more coffee. I'm probably using the wrong kind of needle for this, and I don't know what size it is. Sorry, I'm not much help when it comes to sewing. Wanna come over and sew some Velcro on for me? I'll make you a cup of coffee!
Okay, before we get to my horrible example of sewing: I really recommend putting the rough side of the Velcro on the side that faces out. In case the pieces aren't exactly lined up when attached to the little one, the soft side of the Velcro will be towards the skin.
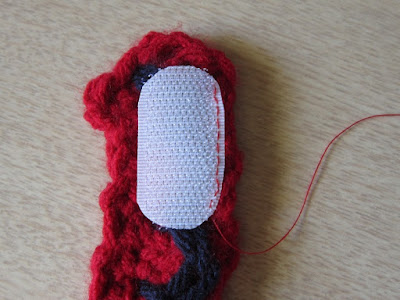
What I have is a big, long tape of Velcro. I've seen it sold in pre-cut squares and rectangles, plus ovals which may be perfect for this project. But since I already have this kind, I cut about 2" (5 cm) of Velcro, then I trimmed the ends to round the corners.
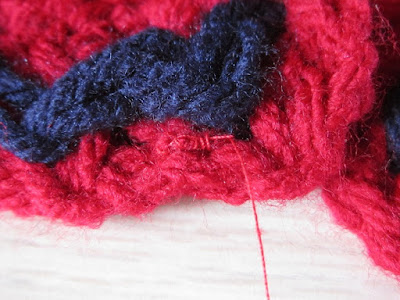
Before I attach the Velcro, I secure the thread to the crochet piece with a little back stitching. Although I know the correct term for this, I'm probably doing it wrong - I leave a long tail after sewing through a bit of yarn, then sew over and over... And over, and over the tail.
I sew up through the Velcro then back down through it, without going all the way through the crochet piece. I angle my needle so that it comes out to the side of the Velcro before traveling through to the back of the yarn. Each time I bring the needle back up, I begin before the last stitch made, to (hopefully?) secure the thread.
I did pretty good at making a straight line for part of the seam, but the rest shows my true abilities.
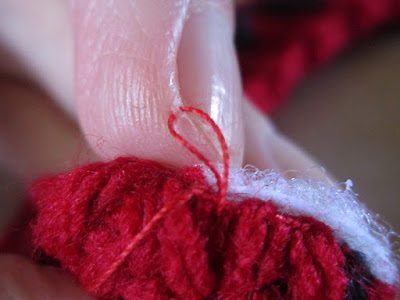
And this picture shows my sewing abilities at their full extent. It's a good thing that only went through the top layer of skin. Once, I went horizontally all the way through my nail bed. This is where I'll stop the sewing tutorial and tell you to proceed at your own risk.
I don't want it to end that way, but I'm really not your teacher when it comes to sewing. Twice, I sewed myself to the pattern, and almost bled on it after a good jab of the needle. I know, I know... Use a thimble... But how do you keep the thing on your finger? It's constantly falling off and just annoys me.
I remember another of my mother's attempts at teaching me to sew: "You really don't get this, do you?" I can do algebra and geometry. I'm not always grammatically correct, but I know when you're not. And I have common sense enough to back out of a parking space and not cause a disaster. Sewing is just... Beyond me. I managed to attach the Velcro without a trip to the hospital. My seams are strong; threads intact. I wish you the same. I'll just spare you the pictures with the bandages and bloody fingers. After all, Halloween is over, right?
Happy Crocheting!
And successful sewing, too!


Comments
Post a Comment
This is not a political website. Any comments with political content will be removed. Y'all need to learn how to act right.