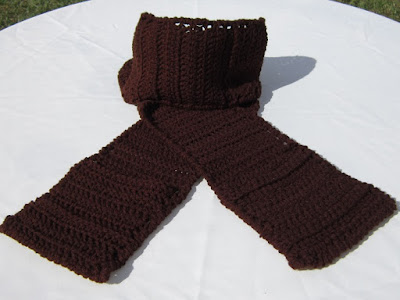
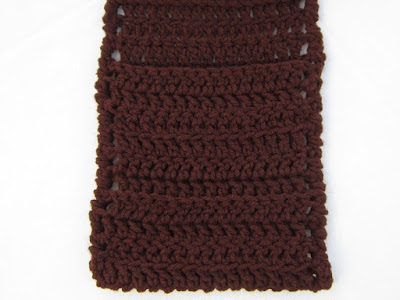
The Chocolate Pocket Scarf uses basic stitches worked into front and back loops to create simple texture. This is a great pattern for beginners to practice the double crochet stitch and working into the front and back loops of stitches! The simple pattern repeat makes this a great project to take with when you're on the go. Directions and photo tips are given for the crab stitch border shown, or beginners can follow the instructions for working an easier basic single crochet border.
Make this scarf with the pockets as written, work up an extra long scarf without pockets, or save some yarn and bind off early - This pattern leaves you many choices! The finished length of the version I made with pockets is 78" (195 cm) long. The width as written is 6" (15 cm). You can easily add more stitches for a wider scarf, but this pattern is plenty warm and cozy as-is!
Skill level:
Materials:
Worsted weight (4) acrylic yarn
-I used Red Heart Super Saver in Coffee... *In an effort to clean out my stash, I'm using what's left of a jumbo skein, and I still have a ton left over. (See the picture before the border tutorial to see how much is left!) One regular size skein will be fine for this project.
Crochet hook size K-9.00MM or size needed to obtain gauge
Yarn needle
Stitch markers (optional, but recommended)
Gauge:
In 4" by 4" (10 cm by 10 cm)
13 double crochet
6 rows
Notes:
Chain-3 at beginning of rows always counts as one double crochet.
Use stitch markers to mark pattern repeat. If you choose to not use stitch markers, something like a saftey pin may be desired for creating the pockets.
Tips and pictures included for help with creating the pockets and working the border!
Stitches and abbreviations:
Chain (ch)
Foundation Double crochet (FDC) - optional
Double crochet (dc)
Slip Stitch (sl st)
Single crochet (sc) - for beginner's border
Reverse single crochet/crab stitch (rev sc) - for advanced border
Back loop (b/L)
Front loop (f/L)
Begin/beginning (beg)
Space (sp)
Stitch (st)
Repeat (rep)
Directions:
Row 1:
Chain 4, make 17 FDC. (Or, you can ch 20, and make 1 dc in each chain beginning in the 4th ch from the hook.) (18 dc)
Row 2:
Ch 3, turn. 1 dc in each of the remaining 17 FDC.
Row 3:
Ch 3, turn. 1 dc in b/L of each of the remaining 17 dc.
Row 4:
Repeat Row 3.
Row 5:
Ch 3, turn. 1 dc in the f/L of each of the remaining 17 dc.
Row 6:
Repeat Row 5.
Row 7:
Ch 3, turn. 1 dc in each of the remaining 17 dc.
Row 8:
Repeat Row 7.
Row 9... (122)
Repeat Rows 3 through 8 to the desired length. Do not bind off; continue to work border and create pockets.
Example repeats pattern 19 times.
Border:
If creating pockets, you may want to count your rows and fold them over now, pinning in place with a locking stitch marker of safety pin.
If not creating pockets but you wish to add a border, you can follow these directions without folding the ends over.
(Advanced border)
To create first pocket - Fold the last 10 rows of the pattern over the next 10 rows. Slip stitch to the 20th side post.
Ch 1 (does not count as stitch). *Make 2 rev sc in each side post, working through both thicknesses to corner of pocket. Make an additional st in the corner sp. Rev sc in the space between each post across. Make 2 more rev sc in corner sp.* 2 rev sc in each post sp up length of scarf, stopping to fold scarf over for pocket at the 20th space from end. Repeat from * to *, then work 2 rev sc in each sp to beginning ch-1. Join with a sl st to beg rev sc. (See pictures for tips!)
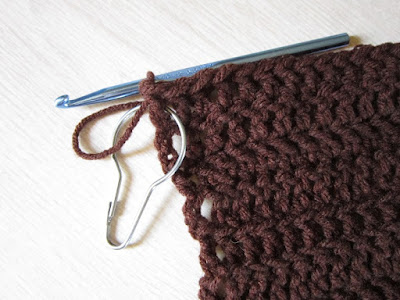
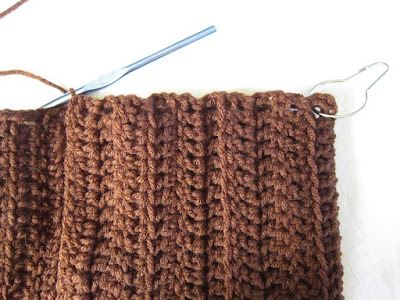
*I removed the stitch marker from the joining space of the pocket, but here you can see the other marker still in the corner space. Holding the sides together while creating the pockets will save you the headache of missing a space!
*Once you join the spaces to create the pocket, you will chain one before working the reverse single crochet border, working into the same space. The chain-1 does not count as a stitch, unlike in the beginner's border.
*You may still want to mark the chain-1! Once you work the first reverse single crochet, it will twist around. And working into the beginning stitch to join can be difficult! Mark the chain-1 before the beginning stitch so the marker won't be in the way when you join.
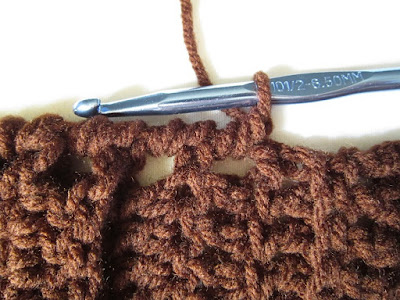
*Work an extra stitch in the corner space before working across.
*After working across, work an extra stitch in the corner space.
*An extra tip for beginners working the basic single crochet border: You will be working in reverse order of these directions. The second pocket for the advanced border will be the first pocket for you.
*Here's where you can cheat at joining the reverse single crochet. Remember, we're going to skip that difficult-to-find beginning chain, and join in the first rev sc made.
*Remove the hook from the stitch, and flip the pattern over to the reverse side. Place the working loop back on the hook, and insert the hook in the beginning reverse single crochet as for a basic single crochet. Slip stitch to join, and you're done!
...Well, almost. You still have to bind off and weave in those ends!
(Beginner's border)
Ch 1 (counts as fist sc). *Make 2 sc in each post space up to the 20th space from the end. To create pocket: Fold over end, work 2 sc through both thicknesses to corner. Make additional sc in corner sp. Make 1 sc in sp between each post across. Make additional sc in corner sp.* Repeat from * to *. Make 2 sc in each remaining space before beginning ch-1. Make 1 sc in same sp as beg ch-1, join with a sl st to ch-1.
Bind off, weave in ends.
**The directions for the border made sense while I was creating the scarf, but after writing it out, I saw room for confusion. Just to be clear: Each pocket will not be 20 rows long - Just 10 rows for the front side of the pocket, and the ten rows that create the back side of the pocket will remain on the body side of the scarf .
***One last tip!! I find this yarn to be too scratchy for scarves! So, why am I using it for scarves? Because I've found the miracle cure! It's a well-known tip that you can soften scratchy acrylics by using some hair conditioner, but I may have found the best one out there! After running out of the usual cheap stuff, I grabbed my own conditioner to soften some yarn... And the result is: Amazing! It's still cheap to buy, too! And unlike the other cheap stuff I've been using, the yarn stays soft, even after washing it in the laundry without it. Or, you can just keep washing it with this conditioner, so it will be forever scented with its wonderful coconut-y tropical scent... Either way, it will be awesomely soft!
(And no, they're not paying me to say that. It just works!)
Happy Crocheting!










Comments
Post a Comment
This is not a political website. Any comments with political content will be removed. Y'all need to learn how to act right.