Do you ever get done with a crochet project, only to see all those yarn ends to weave in, then realize you're not done at all? I have a horrible habit of finishing a pattern, then thinking "DONE!", but we all (should) know this isn't the case. A pattern may be finished once the last stitch is complete, but a project isn't done until it's wearable or usable. When you've worked a project which requires more than one skein of yarn or color changes, those tails just might haunt your dreams at night, like mine.
After four nights of weaving in ends while finishing a large afghan, I began having nightmares about being attacked and eaten by my project. The tails became tentacles which would entwine my body and suffocate me while I struggled to get free. Eventually the afghan devoured me.
After four more nights of weaving in ends while still having the same nightmare, I stuffed the project in a cabinet, never to work on it again. Sad. I should have used this technique instead.
Laugh if you want to, but maybe you've had a similar situation happen to you. Bad dreams about a silly afghan might still be a problem of mine, but weaving in ends will never bother me again. The Russian Join is a method of joining two skeins of yarn together without leaving any tails behind. Spending some time to learn and use this skill will save you a bunch of time on your next big project.
*I've wanted to create this tutorial for a while, but research has held me back. I really wish I could explain the origin of this method, but it seems to have quite an elusive past. I've done internet searches, watched videos, and poured through all of my old reference books, but all have failed to provide information about where and when the Russian Join was first documented. However, I haven't seen or read everything out there, so if you can help, please, provide information for us all.
We can assume the skill originated in Russia, but this may not be the case, as with a few other crochet techniques such as Bavarian crochet. Sometimes, there is plenty of material teaching a skill, but no documentation of its source. I do have a theory about how this method was created, if you'll allow me to speculate:
First, let's understand spit splicing, a way a joining animal fiber yarn. With this technique, the ends of each strand are teased or "fluffed" out, then the strands are combined and twisted. Finally, you spit on it, then agitate it in your hands, which essentially felts the fibers together to create a solid strand.
Non-animal fiber yarns such as cotton, acrylic, or blends can't be felted, so my guess is that the Russian Join was invented in more modern times to replace spit splicing. It creates a slightly thicker join, but no ends to weave in, right? Well, in fact, you'll still need to do a little weaving, but it's nothing compared to a nightmare afghan. Let's learn!

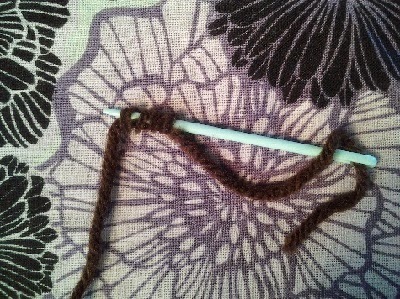
Above is an example of what the Russian join looks like when the same color yarn is being joined.
To better demonstrate the procedure, I'll generally be using different colors (top photos). Many examples are added showing the joining of like colors (bottom photos). This method is most commonly used to attach duplicate skeins, but it can also be utilized when working with different colors. It takes a little more experience using the Russian Join before you will link your strands in the correct spot for a color change, but don't let that discourage you! Once you know how it works, you just have to master where to do it.
1. Thread the end of one strand of yarn through a yarn needle.

2. At least 2 inches (5 cm) away from the needle , begin weaving the needle through the strands of yarn.

A great trick to do this: Wrap the needle as if to yarn over, splitting the strand each time.


4. Thread the other strand of yarn on the needle. Run through the loop made in the first strand.

5. Repeat steps 1-4 as for the first strand.

6. Gently tighten the ends of both strands.

An extra tip: See the top example (2 colors) after pulling the tails? It doesn't look so pretty. To fix this, give your yarn a twist to tighten the ply back up. It may be necessary to repeat this a few times to get it settled together. I didn't play a trick on you, the top example and the one below are the same piece of yarn. Trim the ends, and continue working!

Okay.....
Just for all of you, I (temporarily) overcame my fear of the nightmare afghan, so I can show you what I'm talking about:

It's a 3-strand afghan made in four pieces, then joined using two strands for each of the four seams. A 2-strand border is added, and there's still a piece to be attached which goes in the center. Three colors are used, with two large skeins a piece of two colors, and six skeins of the third color.
And now my nightmares return...
Don't let it happen to you! It doesn't take much time to master this skill, but it sure will speed up the clock on any project.


Comments
Post a Comment
This is not a political website. Any comments with political content will be removed. Y'all need to learn how to act right.